Welcome Everyone!

Remember to "click" on all pictures if you'd like to see them a little closer.

Wednesday, July 29, 2020

Wild Whisper Christmas Coffee Tin

Hi Everyone!

I'm up on the Wild Whisper blog today with a project that is a continuation of Karla's Christmas in July theme! You can see her project that uses the same piece of Sensations paper here. We both instantly thought of Christmas when we saw this sheet!


I chose to upcycle a coffee tin and turn it into a beautiful container. This container could act as a gift box, or it could sit on your counter at Christmas time and hold gift tags, tape, stamps, etc. I also found that it holds a dozen or more A2 size cards, so if you're a cardmaker, and you like to gift a package of cards at Christmas time, you could tuck them in this can and you'd be done!

My coffee tin was 19.5" in circumference and 5-5/8 + 1/16" tall. This allows you to cover the exterior of the tin with one 12x12" sheet that is cut into two pieces. I used a second sheet to cut a small circle to cover the lid.


I love to pick up Christmas florals on sale, so I always have a bouquet in my stash that I can cut into and pull out pieces of this and that for decorating projects.


Pieces from the photo above were used to decorate the lid of the coffee tin.


To add the bells, I tied them to a piece of ribbon, folded it in half with one end longer than the next, and glued it under the bow.


If you compare the photo above, with the one below, you will see that I started out with the idea of spacing pointsettias around the tin. Once I added the gold pom poms to the top and bottom I decided I wanted to remove the poinsettias and let the prettiness of the ribbons be the focal point. There was so much going on on the lid that it felt to me that the poinsettias made the whole thing too busy. Luckily for me they were attached by brads, which made removal easy!


This is a quick, simple project that makes use of something that would just go in the garbage. It is great fun digging into your stash to decorate it as well. (Some of these ribbons I have had for years!) 

Be sure and use my coupon code if you go shopping at the Wild Whisper store! DTLINDA

Happy Creating!

Linda

Wednesday, July 15, 2020

Wild Whisper: Black and White - Clean and Simple

Hi everyone,  

Today I'm here to show you what you can do with black and white paper, dies, and a pretty stamp set!  All the cards are 4.25" x 5.5".


I began by making my card bases using the floral stamps from Happy Tails.


For the Happy Birthday card's base, I took the smaller floral stamp and stamped it around the edge of the card mat.  The idea is to keep turning your stamp so that the card base has a random look to it.


Then I stamped the same stamp on a piece of white cardstock and matted it with black, die cut my sentiment, added sequins and it was done.  This piece was popped up on the card with foam tape.


The Hello card was done in a similar manner.  This time I used the littlest flower stamp and spread out the stamped images for a more airy look.  


On this one, I used the largest floral stamp in the set.


The Thanks card was made using the smaller floral stamp again.  When I make this type of card, I start in the middle and then stamp around my first image.  Again, as before, you need to keep turning the stamp as you stamp it to have a random look to the overall card.  

It was very, very tempting to colour this card, but I kept to my theme of Black and White!


On this card, the same as the others, the focal piece was popped up with foam tape.


This was a fun afternoon, just stamping and playing!  I hope you give it a try!

That's it for me this week, remember... don't go shopping without using my code (DTLINDA) in the coupon box for a discount on your order!

Happy Creating!

Wednesday, June 24, 2020

Wild Whisper Masculine Cards

Hi everyone,

I'm up on Wild Whisper's blog today, and I'm hoping to help you out with one of the biggest stumbling blocks for card makers... masculine cards!  Am I right???

Wild Whisper's Adventure collection makes it easy for you! 

To make this set of four cards, I used the card pack, the ephemera pack, sequins and a few flair buttons.  I always use 110# cardstock for the card base, and I popped up the focal images on each card.

This first card is my favorite of the four, because I just love this bear.


Card number 2 is one that I thought would make a great anniversary card for that adventurous couple that is always off hiking.


Card 3 is just plain fun with its collage of sayings and images! (All done for you on one collection card I might add. Easy peasy!!)


Card 4 would make a nice "Thinking of You" card.


There you have it!  In the time it took you to read this post, I finished up 4 cards!  Well.... maybe it took a wee bit longer, but not much!  

Happy Creating friends!

Linda


Thursday, June 11, 2020

Wild Whisper - You Keep Me Safe, I'll Keep You Wild

Hi everyone,

I'm up on Wild Whisper's blog today with a new project.  I used the new and improved Adventure collection for this project.  In real life, the lightest paper that you see, is all the same colour.  When I photographed the two layouts before merging them side x side with my software, the lighting was slightly different.  

This is the left page up close:

I used a Close to My Heart sketch for this project, and added some notes of my own.

Here is the right page up close:


This is such a fun collection.  It would be good for any kind of adventure... even camping in your own back yard!  As always, the ephemera elements are wonderful!  Don't you just love this bear with the painted wilderness background!!  When I add elements like this, I like to place them where they create a little story.  I love how my grandson appears to be looking at the bear with a little uncertain apprehension.  LOL

This title was perfect to go with images of big sister holding onto little brother.

I created this double embellishment by using a bit of one of the border strips.

Gotta have a little "flair"!

Stack and combine ephemera to create a title.

That's it!  You're done.  Layouts are fast and easy with ephemera and beautiful paper!!

When I was done with the double layout, I had some misc photos left over and I used them up in my version of a "pocket page"!

Happy Creating!

Share with us on the Wild Whisper Community page if you should use the sketches!!  We'd love to see what you create!

Also, don't forgot to use my DT code (DTLINDA) in the coupon box if you do any shopping in Wild Whisper's store! 

Linda


Monday, June 1, 2020

MTW June Main Challenge - Hello Spring!

Today, we are releasing our June Main Challenge over on the More Than Words challenge blog:  HELLO and WINDOWS & DOORS.

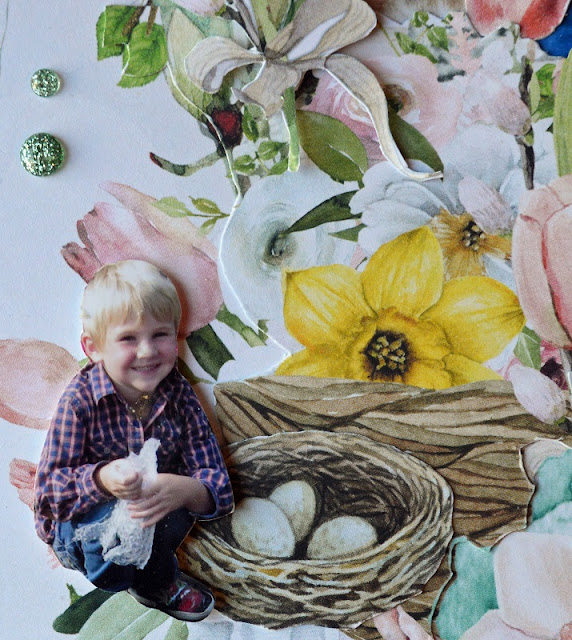
For this layout, I finally gathered up my courage and cut into the Mintay Papers' "Beauty in Bloom" paper collection that I've been hoarding.  Spring is my favorite time of year and the paper had all the elements required for the challenge.


Our Main Challenge at More Than Words is always based upon a word inspiration and a creative challenge.  For June the word is HELLO, and the creative challenge is to use either a window and/or a door on your project.  You can see the rules of the challenge here.

To create this layout, I started out with this page for the base:

I changed it by adding the banner pieces from the coordinating cardboard stickers, and a lot of fussy cut embellishments from the image sheet in the collection.  Here's a close-up of the banner.  


For the focal part of the layout, I situated my grandchildren on the window ledge, and then built up the left side of the page with bits and pieces of flowers, plus that cute bunny.  A few of the elements I popped up with foam. (I will always giggle at this photo of Austin... the little munchkin had dressed himself that day and put his jeans on backwards.  There was no way he wanted to change them around either!!)


Beside "big" Emily, I added a bird for "little" Emily to hold out her hand to.  She loves birds... especially when they jump onto her hand!


Creating these little scenes on the layout was the fun part for me.  I could imagine how happy and excited the kids would be if they could play with bunnies and birds.  That piece of plastic that 4 year old Austin is holding is bubble wrap.  My grandkids are crazy for that stuff.  It's the best toy ever!  They love popping it!  


I filled up the bottom right corner with this little scene.  


So how did I figure out the sizing for the kids photos?  I started out with the photo below.  (We were having a fun photo shoot in my front garden that day.) I liked the fact that the kids were sitting in this photo, because I knew I would be able to sit them on the window ledge once I fussy cut them out.  Their images in this photo were too small though... I knew I wanted them to be about 5" tall.


So I cropped the photo and sized it to be about 5-1/2" tall and 6" wide.  I also cropped out Emily's dolly bag that was sitting at her feet.  (She was taking very good care of her dolly that day!)


For the other 3 scenes I used these photos, cropped them as I did above, but this time I re-sized them so the kids were only 2" tall.  (I had just finished planting my yard - we removed all the grass and put shrubs and perennials in - and the kids were sharing their favorite parts of it with me.)

So this is what the sheet that I printed looked like, once I had everything all cropped and sized to how I wanted it.  Then I just fussy cut the kids out of the photos.


I hope this has helped you, if you should ever want to try creating your own fussy cut scenes!

Please be sure and go to the More Than Words blog here, and check out all the fabulous projects the design team has done to inspire you.!  Then maybe give the challenge a try yourself.  
We have some fabulous prizes up for grabs!

Happy Creating!
Linda

PS If you're interested in seeing "Then and Now" photos of my yard project, I've shared them below. 

 This first one is what the front yard looked like when we purchased the house.  The grass was always scruffy... we just couldn't get it to grow.  I was also  looking for some extra gardening space because our dogs have the run of the backyard, and you know what dogs are like... they chew plants and dig holes. So out went the grass... we brought in some loads of topsoil, and got busy planting.


The plants all looked so tiny, but I loved it much better than the grass.


This is it about 4 years later.  It was well worth all the hard work!  
(I don't miss mowing the lawn one bit!)


Wednesday, May 27, 2020

Wild Whisper - Happy Tails Mini Album

Hi everyone,  Today I'm sharing a cute little project over on the Wild Whisper blog using the Happy Tails collection.

Starting from the age of 4, I have been blessed over my lifetime to have shared and continue to share, my life with many different pet dogs.  They have all been special and each one has taught me new lessons. 

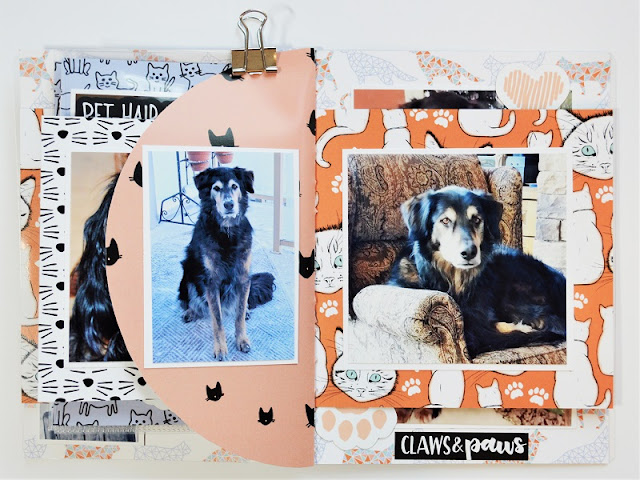
This paper collection is so cute, that I decided to make a mini-album containing my favorite photos of each dog.  Not all are mine, but I have loved the dogs my parents had, and also my daughter's current dog, so I have included them in this album as well. 

*Note... I have chosen to focus on the dog themes in this collection, but for all you cat lovers there are many pieces and papers that you could use for your favorite cat friends as well.

I was inspired to make this album, by one that was done by Paige Taylor Evans.  You can see hers here.  I have shared all the cutting instructions for mine, over on the Wild Whisper blog, so if you would like to make one of your own, you can check out the details there.


Some of the pages I have left blank to fill in with photos later.


So there you go... I've managed to fit 6 decades of family dogs into this little album!  It is great fun to browse through it and remember all the good times.

Thank you for stopping by today.  As usual, if you should do any shopping, get yourself a discount by using my code:  DTLINDA in the coupon box!  I think this mini album would work for ANY of the Wild Whisper collections.

Happy crafting!

Linda