Welcome Everyone!

Remember to "click" on all pictures if you'd like to see them a little closer.
Showing posts with label Wild Whisper. Show all posts

Wednesday, December 2, 2020

Wild Whisper - Using Non-Christmas Paper for Christmas Cards

Hi everyone,

It's December, and time to push the cardmaking into high gear!  

So what do you do if you don't have any Christmas paper, and you're in the mood to make Christmas cards???

I'm going to show you how to use a pack of non-Christmas paper and challenge you to try it!


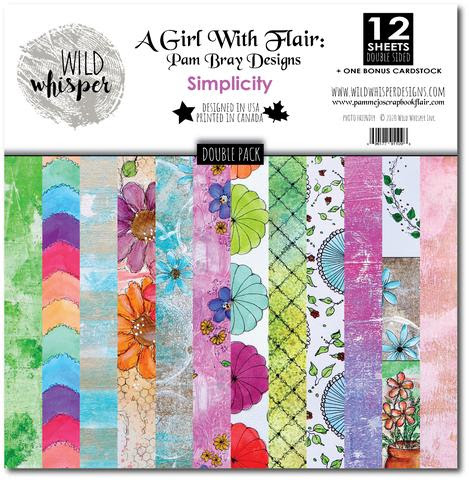
The collection I started with is Simplicity by Pam Bray.  At first glance, it doesn't look very Christmassy does it?

Flipping through it though, there was a wreath that caught my eye.  Next step was to find some background paper for the wreath and I loved this lattice piece.


The reverse side of the wreath had the perfect shade of green to mat it.

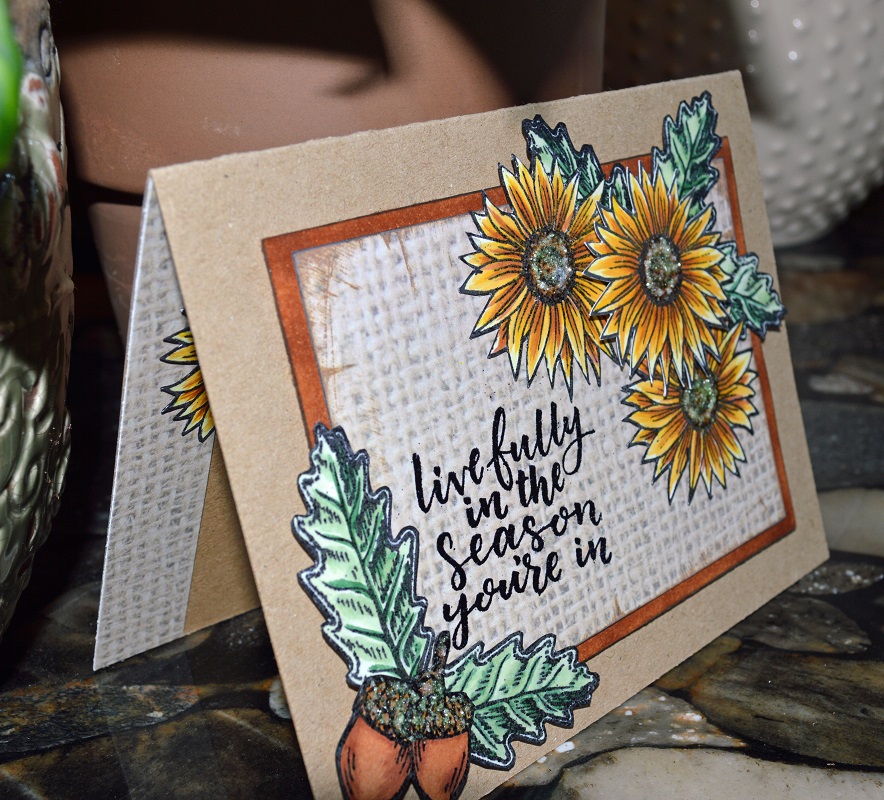
If you prefer a more simple style of card, you could have stopped right at this point...


but me... I love lots of detail and embellishment, so I continued to build and add layers to the card.  The stamped word, Joyful, is from Wild Whisper's "Home for the Holidays" set. 

Every year I seem to find one stamp that speaks to me, and this year, this is the one!  I love the font and the feeling of joyfulness that it imparts.  Hopefully you have the set in your stash, as it's no longer available in the Wild Whisper shop.


I splurged and bought Bekka Feeken's "Christmas Cascade" set of dies this year, and using it I cut poinsettias, ribbons, and snowflakes out of the piece of red paper below.  I placed my dies where the reddest parts of the paper were.

The little deer, I merrily cut out of this piece below, forgetting that I wanted the pretty paper on the other side for a layout.  *slapping forehead*  Do you ever do that?  

The deer was a little light in colour, so I inked up her edges with some Fired Brick Distress Oxide ink.  The oval piece she is matted on, has pop up foam underneath it, to give it some dimension.


For the inside of the card, I used the negative piece of one of my diecut snowflakes, and the Merry Christmas dies that came with my die set.


It was fun challenging myself this way.  Give it a try and surprise yourself with what you can create with non-Christmas paper!

I hope you will have a "Joyful" time as you embrace the new type of Christmas we are going to have this year.  It will be one for the memorybook!

Check out the Wild Whisper store and to get a 10% discount, use my DT Code - DTLINDA.

Happy Creating!

Linda


Wednesday, October 7, 2020

Wild Whisper "Sensations" Birthday Card

 Hi everyone!

I'm here today with a slimline birthday card to share with you. 


I was fishing through my leftover bits and pieces and found this lovely piece from Pam Bray's "Sensations" line to use as a base for the card front.


I cut it down and layered it over top of another rectangle that was 3-1/2" x 8-3/4".  Then I added a couple of pieces from this page of super cute die cuts.


I distressed the edges, added some twine and popped up the die cuts for some dimension.


For the inside, I used up more of the patterned paper and embossed it with this birthday stamp and die set from Close to my Heart...  Wishing You Everything Stamp + Thin Cuts  Z3779.


I love the "artsy" look that Pam's beautiful paper gave to the card.

Happy Creating!

Linda

Thursday, September 24, 2020

Wild Whisper - Fall Sunflowers

 Hi everyone!  I was playing with the Strength of the Season stamp set again this week, and ended up creating a card that is a personal favorite of mine. 


I have to admit though, it seemed to take me longer to photograph it than it did to create it!  For some reason it was hard to capture the true colours of the card and the glitter on the sunflowers and pine cones that is so pretty in real life!  You can see a bit of it in this side-shot below.


I zoomed in on the sunflowers to share a close-up of how I coloured them.  Using golds and yellows just seems so right at this time of year when all the trees are turning colour.

To colour the petals I used the following copic colours in this order: Y11, Y19, YR24, E17,  & Y17.  I painstakingly coloured the centers with:  YG00, YG13, E47, E37, E34, E49, & E34... then I covered them all up with Nuvo "Fresh Snowfall" Glitter Accents!  It might seem like a waste of all that colouring, but the coloured centers still show through... the glitter just gives them some dimension and sparkle!

For the leaves I used: G28, G21, and G20.  The acorns were: E17, E37, & E47.


I used these flowers in this blog post... and you can see I coloured them quite differently!  That's the fun of stamping!

The burlap paper came from a past collection called "Forever and Always".  I made the rust coloured mat by colouring the border of a piece of X-press It paper with E37, and I inked the burlap with "Gathered Twigs" Distress Oxide ink.


Here's a look at how I finished the inside.


Happy Fall everyone!  We're being blessed in Alberta with warm temperatures and an extended flowering season so life is good!

Don't forget, Wild Whisper has just filled the store with new releases!  Go here for some shopping therapy and enter my code:  DTLINDA in the coupon box to get a 10% discount!!

Happy creating,

Wednesday, August 26, 2020

Wild Whisper - Back to School Bookmarks


Send your kids "Back to School" with bookmarks made especially for them!

First... who said bookmarks have to be small???? I used my Pinkfresh slim dies to make these bookmarks, and let me tell you, the kids aren't going to lose these ones! The largest one is 4.25" x 9"!


I made this first bookmark for my granddaughter who is devoted to her cat Ginger. The paper collection and ephemera pack used for this is the ever-so-cute Happy Tails.


To make the tassel, I followed this tutorial. I also followed the You Tube video below to tie the tassel together tightly without any ends showing.


Here are the layers of the tag. (Note: I changed out the white heart paper for the dark hearts, as I felt they looked better when I went to put the bookmark together.) Heart paper is 4" x 9 1/8". Orange kitten face paper is 3-5/8" x 8-5/8", as is the blue kitten paper.


This tag was made for my grandson who is going into grade six. It suits him because learning is an adventure and he loves to learn!


I cut the striped part of the bookmark with this PinkFresh die.  I love the effect it gives.

I didn't think to do this on Emily's bookmark, but for Austin's, I cut a piece of acetate packaging and glued it in between the last layers. This is to hold the ribbon a little more securely and keep it from pulling out. On the first bookmark, it would help keep the tassel from tearing out of the hole.


I think my grandkids are going to love these. Hope you did as well!

Be sure and check out the Wild Whisper store this week. There's so many great things to treat yourself with! Put my code DTLINDA in the coupon box and you'll get a 10% discount!

Happy creating!

Wednesday, July 15, 2020

Wild Whisper: Black and White - Clean and Simple

Hi everyone,  

Today I'm here to show you what you can do with black and white paper, dies, and a pretty stamp set!  All the cards are 4.25" x 5.5".


I began by making my card bases using the floral stamps from Happy Tails.


For the Happy Birthday card's base, I took the smaller floral stamp and stamped it around the edge of the card mat.  The idea is to keep turning your stamp so that the card base has a random look to it.


Then I stamped the same stamp on a piece of white cardstock and matted it with black, die cut my sentiment, added sequins and it was done.  This piece was popped up on the card with foam tape.


The Hello card was done in a similar manner.  This time I used the littlest flower stamp and spread out the stamped images for a more airy look.  


On this one, I used the largest floral stamp in the set.


The Thanks card was made using the smaller floral stamp again.  When I make this type of card, I start in the middle and then stamp around my first image.  Again, as before, you need to keep turning the stamp as you stamp it to have a random look to the overall card.  

It was very, very tempting to colour this card, but I kept to my theme of Black and White!


On this card, the same as the others, the focal piece was popped up with foam tape.


This was a fun afternoon, just stamping and playing!  I hope you give it a try!

That's it for me this week, remember... don't go shopping without using my code (DTLINDA) in the coupon box for a discount on your order!

Happy Creating!

Wednesday, June 24, 2020

Wild Whisper Masculine Cards

Hi everyone,

I'm up on Wild Whisper's blog today, and I'm hoping to help you out with one of the biggest stumbling blocks for card makers... masculine cards!  Am I right???

Wild Whisper's Adventure collection makes it easy for you! 

To make this set of four cards, I used the card pack, the ephemera pack, sequins and a few flair buttons.  I always use 110# cardstock for the card base, and I popped up the focal images on each card.

This first card is my favorite of the four, because I just love this bear.


Card number 2 is one that I thought would make a great anniversary card for that adventurous couple that is always off hiking.


Card 3 is just plain fun with its collage of sayings and images! (All done for you on one collection card I might add. Easy peasy!!)


Card 4 would make a nice "Thinking of You" card.


There you have it!  In the time it took you to read this post, I finished up 4 cards!  Well.... maybe it took a wee bit longer, but not much!  

Happy Creating friends!

Linda


Thursday, June 11, 2020

Wild Whisper - You Keep Me Safe, I'll Keep You Wild

Hi everyone,

I'm up on Wild Whisper's blog today with a new project.  I used the new and improved Adventure collection for this project.  In real life, the lightest paper that you see, is all the same colour.  When I photographed the two layouts before merging them side x side with my software, the lighting was slightly different.  

This is the left page up close:

I used a Close to My Heart sketch for this project, and added some notes of my own.

Here is the right page up close:


This is such a fun collection.  It would be good for any kind of adventure... even camping in your own back yard!  As always, the ephemera elements are wonderful!  Don't you just love this bear with the painted wilderness background!!  When I add elements like this, I like to place them where they create a little story.  I love how my grandson appears to be looking at the bear with a little uncertain apprehension.  LOL

This title was perfect to go with images of big sister holding onto little brother.

I created this double embellishment by using a bit of one of the border strips.

Gotta have a little "flair"!

Stack and combine ephemera to create a title.

That's it!  You're done.  Layouts are fast and easy with ephemera and beautiful paper!!

When I was done with the double layout, I had some misc photos left over and I used them up in my version of a "pocket page"!

Happy Creating!

Share with us on the Wild Whisper Community page if you should use the sketches!!  We'd love to see what you create!

Also, don't forgot to use my DT code (DTLINDA) in the coupon box if you do any shopping in Wild Whisper's store! 

Linda