Showing posts with label G45. Show all posts
Monday, September 9, 2013
Monday, August 26, 2013
Showcase Monday at Scrapbooker's Paradise
Good Morning Everyone!
I'm filling in over at Scrapbooker's Paradise today, so thought I'd share the card I made and a quick little tutorial.
Supplies Used
I'm filling in over at Scrapbooker's Paradise today, so thought I'd share the card I made and a quick little tutorial.
To make the background for my focal piece on the front of the card, I dropped 3 different colours of Distress re-inkers on top of an acrylic block and sprayed them with water to get them blending together and moving around. Next I took a piece of watercolor paper, misted it with water and placed it on top of the block, gently patting it down but not swirling it. I lifted it straight up off the block and dabbed it with a paper towel to remove the excess ink from the watercolor paper.
I had enough ink on the block to do this a second time. Then I just stamped my image using Versafine ink and cut it out with a circle die. I finished it off by going around the edge with a Chalk Marker from CTMH.
Have a great week everyone!
Linda
Supplies Used:
Spellbinders Lattice Rectangles
Martha Stewart Punch
Joy Crafts Small Leaf Die
Misc flowers from stash
Wednesday, July 10, 2013
Wild Wednesday at Scrapbooker's Paradise!
Good morning!
What can be wilder on a bright, sunny, summer day than Christmas in July!!!
With that theme in mind, I decided to haul out my favorite paper line by Graphic 45 "Place in Time", and make a Triple Easel Card using the December page.
What can be wilder on a bright, sunny, summer day than Christmas in July!!!
With that theme in mind, I decided to haul out my favorite paper line by Graphic 45 "Place in Time", and make a Triple Easel Card using the December page.
You will find a wonderful tutorial here that tells you how to make these cards. I used a piece of the patterned paper to make the base of this card, and if I was doing it again, I would use card stock instead. This card is supposed to stand up on its own, but mine is a little flimsy and wobbles a lot. Sturdy cardstock would solve that problem I think.
Other than that, this was a quick, easy card to make and I dug into my stash to use up old bling. (This way I'll be able to purchase new stuff when it hits the shelves, without a guilty conscience!!)
Supplies used:
Spellbinders Scalloped Circles
Red flowers from my stash
K&Company chipboard from my stash
I'm kind of happy that I've got an early start on my cards, as there's always SO much to do in December! It's my plan to keep going now and do one a week. Come December, I'll REALLY be smiling!!
I hope you all have a great day today!
Linda
Friday, March 8, 2013
PPC107 Playing in Paradise - Sketch
Wow! It's Friday again! Don't the days fly by?? Today at Playing in Paradise, our challenge is being hosted by Allison, which means we have a cool sketch to use for inspiration this week!
I'm still busy working on my Easter box cards and this week's challenge had me finishing up #2. The sketch was so helpful when it came to embellishing the front of the card and I love the way it ended up looking.
I used the beautiful Prima Firefly Shadows paper to make this card and some pretty Dazzle borders to frame it. I like the dazzles for little projects like this because they are just the right scale. The Firefly paper is such gorgeous paper and the colours are perfect for Spring projects! The die cuts are from G45's "Place in Time". Don't you just love the cute litte flat flowers I've added to the flower cluster? They are a product from Jesse James Buttons called "Flats Spring Fling" and I just think they are the cutest things!
If you have trouble getting your corners to look tidy, here's a little mini-tutorial on how I trimmed the Dazzles on the front of my card.
The top two pictures show how you lay the two strips of Dazzles onto your card. Don't press them down too hard at the corner, in order that you can lift them up, as I have done in the bottom left hand picture. Once you have them lifted up, take your scissors and cut from the outside corner, in, at a 45 degree angle. Then peel off the loose pieces from where you've cut, lay your Dazzles back down on the card, and your corner will be mitred.
Remember: Everyone is invited to play at Playing in Paradise! There are no requirements or restrictions on what
products you can use to create your challenge entry. All we ask is that your
project is new to our challenge. Projects that have been previously posted
will not be eligible for the prize draw. Head over here to see Allison's blog post about the sketch, and for instructions on how to enter your project. You will also be able to see the creative ways the rest of the design team has used the sketch and visit their blogs for more detailed pictures and instructions. (To visit their blogs, just "click" on their names!)
So come on over and play! It's a lot of fun. The prize that's up for grabs this week is a stamp from The Sweetest Thing, matching Chipboard, 2 Stickers, and some Die Cuts worth $20. C'mon. Ya know you wanna win it!!!
See you there,
Linda
PS Don't forget to move your clocks forward at 2:00 am on Sunday night. It's that time of year again!
Friday, March 1, 2013
PPC106 Playing in Paradise Challenge
"Top Of the Morning to You!" It's Friday ... it's March 1st ... and we have another challenge
for you over at Scrapbookers Paradise!
Jessi is the hostess this week and she is challenging us to use the colour green. It can be something to do with St. Patrick's Day, but it doesn't have to, just make something with green as the focal colour!
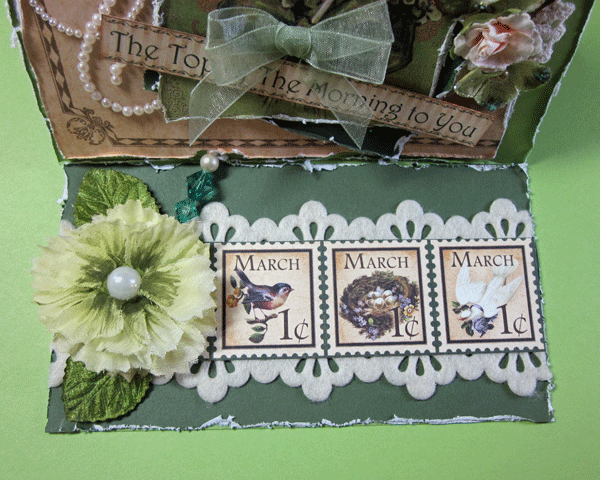
In our family, we are always reminded of our Irish roots on St. Patrick's Day. My Great-grandfather came from Ireland and worked as a blacksmith, a trade which my Grandfather also loved and worked in for most of his life. So of course, I wanted to make something to celebrate St. Patrick's Day. I didn't have to look far, I still have some Graphic 45 "Place in Time" on hand, and the March page had some perfect images for making a card. I decided to make an easel card that can sit on the counter as a pretty little decoration during the month of March.
Making a 6"x6" easel card is quite simple. Start with a piece of cardstock that is 12" x 6" and score it at 3" and 6". Cut another piece of cardstock 6" x 6". This will be the piece you decorate for the front of your card. You glue it to the top of the scored cardstock as shown below.
The last little piece you need to make, is to glue some sort of decoration at the base of the card to give it a "lip" to sit against in order that it doesn't slide down. On my card, the stick pin is holding the top in place.
One last little thing I did on this card was to alter the flower at the bottom. I felt the flower needed a little more depth, so I took a Copic pen and lightly shaded around the center. You can see in the pictures below, where I started shading the flower, and the second one shows it completed.
So now I'm ready for St. Patrick's Day! I really hope you will join us in the Playing In Paradise Challenge this week. Click here for details on how to enter your project, and be sure and check out the projects that have been created by the rest of the design team!
Supplies used that can be purchased at Scrapbooking in Paradise:
I leave you with this Irish blessing:
May you always walk in sunshine.
May you never want for more.
May Irish angels rest their wings right beside your door.
Till next week,
Linda