Welcome Everyone!

Remember to "click" on all pictures if you'd like to see them a little closer.
Showing posts with label swirlydoos. Show all posts

Monday, February 29, 2016

Watercolour Background

Hi everyone!

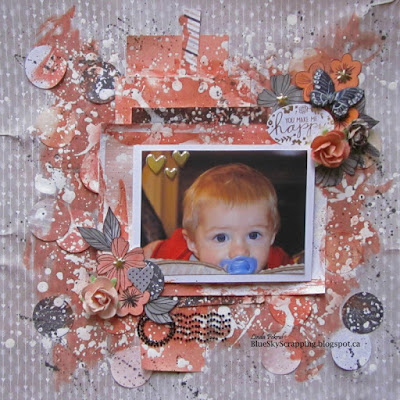
I'm playing on the Round Robin team at Swirlydoos again this month and decided to go out of my comfort zone, and create my own background for my layout.  It ended up being great fun!

I was inspired by both my team-mate that I was following, who had done a lot of splatter painting on her layout, as well as a new challenge blog that started this month called Creative Carte Blanche.  Their challenge this month was "to try something you've never done before."


Soooo, taking a big breath.... I began with a piece of chipboard, some molding paste, and a 12x12 Prima stencil.


I added a few areas of crackle paste, then painted all over with gesso.


I picked my papers, "Secret Letters" by 13 Arts and used coordinating watercolours to paint my background.  It looked very grungy and cool.


To finish the layout, I followed the "sketch" of my previous teammates.  We also had challenge requirements of doing things in "twos", using the colour red, and having a heart on the layout... so that determined how I added my flowers and embellishments. 


This bow is a die from Tattered Lace that I painted here and there with 13 Arts Pink Glitter Ayeeda Ink.


The heart is the Spellbinders "Lovin' Diamonds" die.


The pretty doily die is the "Eastern Star" by Cherry Lynn.


The butterfly was cut from the 13 Arts paper and embellished with bling from my stash.

Thank you to the group over at Creative Carte Blanche for their inspiration to try something new!  
I would encourage you to check them out!!


Thank you also to my team mates Hanne, Jan, and Cheryl at Swirlydoos... I was so lucky to get to follow them all and be inspired by their creations!!

Thanks for stopping by today!!
Linda


Monday, February 22, 2016

A Wonderful Moment

Hi everyone!

I'm hosting a challenge over at Swirlydoos this month.... it's all about love... SELF love!

All month I have been asking everyone to concentrate on things that make THEM happy... and for my challenge I am asking you to follow through on that and make anything you desire, a layout, a card, an altered item, a journal page, a canvas... if you can dream it.... it can be in this challenge.... it just needs to make you happy!

The layout I have done for my challenge definitely makes me happy, and has been inspired by several other challenges.  My son was married this summer to a very lovely young lady, and the photographer caught us in a happy moment....


which was perfect for the challenge over at the MoreThanWordsChallenge Blog where the inspiration was the word "Wonderful" and the creative challenge was to add "Sparkle".  I will show some close ups below where you can see the sparkle I added...so much fun because I'm a "sparkle" and "bling" loving girl!!


To get started on my layout, I used Blue Fern's February sketch.. and a couple pieces of beautiful Blue Fern chipboard to anchor everything.


I painted the Chelsea frame with Jacquard Lumiere Turquoise Dimensional Metallic Paint, and added bits of silver glitter paint here and there.


The second piece of chipboard is called Blooming Foliage - so pretty.  I painted it the same as the frame and you can see it peeking out from underneath this floral cluster above.

My colour scheme came from Cindy Brown's monthly challenge at Swirlydoos...


another thing that made me happy.... because I LOVE pink!!


I'm wondering if anyone recognizes the paper I used for this layout?  It is the beautiful Christmas line by Kaisercraft called Silver Bells.  It was in the December Swirlydoos kit "All that Glitters".  To change it into a piece I could use for a wedding layout, I stenciled and painted over the background.  The stencil I used was this one by Prima called "Floral Rose".


I used Raspberry Ayeeda paint for the background and watered it down here and there; then I went over the stenciled areas with a dry brush and gesso.


This paper line included a piece that was full of roses, so I did a lot of fussy cutting to layer the flowers here and there.  


You can see they are tucked underneath the frame above by the carriage, and below I created a corner cluster with them.


The white lacy leaves were made using a die from JustRite called Open Leaf Vines.

I hope you will join me over at Swirlydoos for my challenge.  There is still a week left to create something, and the lucky winner will receive a small RAK with some pretty pieces of the the new Prima line "Tales of You and Me" tucked in.


Thanks for stopping by today!!
Linda


Wednesday, January 27, 2016

Can you do a Layout in 30 Minutes????

The challenge that I did today, was fun….TOTALLY fun….even though I had to prepare for it like I was going to attempt to climb Mount Everest! 


Sherri, our SGC host at Swirlydoos this month, felt we too often use the excuse of “no time” to not do any creating, and she wanted to show us that we CAN create something in only 30 minutes.  Yes… you heard correctly… we had 30 minutes to create a layout!  Now if you know me, this was a HUGE challenge!  I’ve been known to dither over flower arrangements for over an hour… let alone all the other elements of a layout. 

Disclaimer:  After each layer of gesso and painting, I DID stop the clock while I threw the layout in the oven at 200 degrees to dry.  Once it was dry…the clock was re-started. 

I mulled this challenge over for a long time before attempting it.  LOL.  My first step was to study a video done by one of the designers at Swirlydoos, Cindy Brown, who claimed to love doing layouts in 30 minutes.  If you’ve seen Cindy’s work, it’s awesome… so that’s where I headed first, to see how she creates her magic… and yes… I might have watched her video 4 or 5 times before I felt confident enough to begin!  

My second step, was to use all the leftovers from the layout I made a couple of days ago.  You can go here to see it.  I figured I was being pretty clever with this idea… because I already had practiced putting the flowers together in clusters on the other layout.  Oh yes… I’m a sneaky one!

So I gathered all my supplies close to my craft mat, set the timer on my phone, and began.  Cindy has a very cool technique in the video for creating a layered mat under your photo and I began with that.  In her video she also uses some circle stickers on the background, so I used a punch to cut out circles from my scraps… oh such a time consumer that was!  I kept glancing at the timer, watching the seconds steadily ticking by.  Be still my pounding heart!

When circles and mats were glued down, the fun began.  Cindy creates an awesome effect with watered down gesso (which I had already prepared) and I couldn’t wait to try it.  I grabbed my brush and flicked and waved it with gay abandon… I loved watching the big white splotches explode everywhere!  To my woe though, I discovered when I was done, that my craft mat wasn’t big enough to contain ALL that gay abandon, and watered down gesso really FLIES through the air AND I hadn’t covered my wooden dining table.  More precious seconds ticked by as I grabbed baby wipes and frantically scrubbed down splatters of gesso that were everywhere!  


To get the soft peach look on my layout, I used my CTMH watercolor paints.  I find that #10 from the top is the perfect shade for the Charlotte paper pack.

Time was now running out on me, so when I got to the flowers, I threw the glue on them and smacked them down anywhere… it didn’t matter if two orange colored ones were side by side, it didn’t matter that I got a little extra glue on the journalling chippy and it looked sloppy, it didn’t matter if they didn’t look totally “balanced”… I just needed to get those suckers down there before that clock stopped ticking!


And you know what????  I did it!  I did it and I had great fun doing it.  (I mean who doesn’t love a little adrenalin rush???)  Not only that… I LOVE this piece…. And I feel like an artist!   

This is why I love scrapping challenges… they take you outside your comfort zone …. And they teach you something new!  

If you would like to see how some of the other girls handled this challenge, go here.

Much thanks to Cindy for the time she takes to put tutorials together, and the inspiration that she shares so readily!  You can see all of her videos here.


Thanks for coming on this adventure with me…. I hope I have encouraged 
you to try one of your own!

Linda

Sunday, January 24, 2016

Round Robin Challenge

Hi everyone!  Today I have a layout that I did for the Swirlydoos Round Robin this month.  


To create this layout, I used the Charlotte paper pack from Close to My Heart.  The ladies' club that I host monthly, is using this paper this month, and I wanted to do a tutorial for them... showing how to use watercolor paints and the Springtime Wishes stamp set to create embellishments for their pages and cards.

The challenge requirements for the Swirlydoos Round Robin were as follows:
1)  Use black and white plus 1 color.

2)  Have lots of layers.
3)  Create texture on the layout.
4)  Embellish with flowers, bling or metals.

So let's start with how I created the embellishments.


When I first got my set of watercolor paints, I made a swatch book out of watercolor paper and numbered the paints in the set.  This took a while, but I found it was well worth the effort, because it makes it so easy to match the paints to the papers you are working with.


Here, you can see how I lay the swatches on my paper to figure out which ones I am going to use.  In this case, I used all the greys because I wanted some variations in tone.


This is how I loaded up my acrylic block to begin stamping.


To prepare your watercolor paper for stamping, wet it with water and then touch the paint to the wet surface and let it spread.  You can see that my swatches are "streaky"... that is the way I like them to look.  The variations in color give a more realistic look to your flowers.  By the way, the pieces of watercolor paper that I used, were all scraps that I had saved... so if your scraps are a decent size... DON'T throw them out!!  :)


CTMH has a coordinating die set for the Spring Wishes stamp set, however, because I stamped everything so closely together, I chose to "fussy cut" the images with a pair of scissors.


By stamping lots of flowers in both colors, I had lots of bits and pieces to play with and create clusters on my page.


I made the butterflies from an image I found on the internet.  If you would like the file I created, to print butterflies of your own, just click here.


The gold flower centers, and chipboard pieces are all from the Charlotte Complement pack and the gold Treasured Puffies set.


This picture is from New Year's Eve in 2015.  It was such a fun evening and I love the joy and happiness that was captured in the photo.  

For me, that is what scrapbooking is all about... capturing those special moments in life to treasure forever.

Thank you for stopping by today!

Linda


Monday, October 13, 2014

Lovin' the Sun

Please go HERE to see the complete post on the Swirlydoos October Kit Club Reveal!!


This project was made for Swirlydoos' October Kit Reveal.  
To see more about the reveal, go here.


This layout is all about the warmth of the sun and good times with family.  In Alberta, our summers are short and our winters are long, so we have to enjoy the outdoors while we can!  I love this photo of my son with HIS son, and just had to scrap it!


For this layout I made use of the Finnibair Honeycomb Resist Canvas sheet that is included in the main kit.  I sprayed it randomly with Color Bloom "Gold Foil" and "Glistening Waves" mist.  Then I stamped it with a texture stamp from my stash and distressed and inked all the edges.  A final step was to mix some of the black Chalk paint from the Mediums Add On, with a little bit of water and splatter it along the bottom.  Then the canvas was glued to a piece of the Blue Fern paper that had also been sprayed with the Color Bloom mists.


Here you can see a piece of corrugated cardboard that I sprayed with the "Gold Foil" mist, glued on some black lace from the Embellishment Add On, and then glued the "Gold Leaf" Mica Flakes over top of that.  The edges of the photo were "pounced" with a small stencil brush, using the black Chalk Paint.


One of my favorite things from the Embellishment Add On, was the Ephemera Pack.  It was just loaded with cute little note cards and die cuts, that I used as background mats for the photo, as well as to create some interest up in the corner..


The flower came from the Flower Add On.  It was too light for this layout, so I sprayed it with the "Gold Foil" mist, and inked it lightly with "Black Soot" distress ink.  The leaves were die cut from the Cardstock Add On using Die-Namites "Leafy Flowers" and sprayed with a combination of "Gold Foil" and "Pressed Petal" mists.  


Memory Box


Please go HERE to see the complete post on the Swirlydoos October Kit Club Reveal!!


This project was made for Swirlydoos' October Kit Reveal.  
To see more about the reveal, go here.

This box that I made to hold my Father-in-law's watch, began life


as this:


I used the black Chalk Paint in the Mediums Add On to paint all the exposed surfaces.  I really like this paint.  It goes on smoothly, dries quickly, and is easy to clean up with warm water and soap.


I covered the hole in the bottom, by gluing a piece of silky fabric over some quilt batting that was attached to a piece of chipboard and laying it over top.


Hello

Please go HERE to see the complete post on the Swirlydoos October Kit Club Reveal!!


This project was made for Swirlydoos' October Kit Reveal.  
To see more about the reveal, go here.


My husband's father passed away last week, and so I have been making some things to place upon the Memorial Table at his funeral.  This is one of the last photos of him that we have.  It was a happy moment, watching as he met his youngest Great Grandson for the first time.  I love how they're both checking each other out with smiles!  :)


When you start with such a beautiful piece of paper, the layout practically makes itself!  Throw in the beautiful Prima Winthrop flowers and Epiphany embellishments, Blue Fern chippies, a pretty Wild Rose Lace die-cut, and you have a match made in heaven!


The pretty chipboard swirls, as well as the wooden Prima birdcage above them, were both painted with "Golden Sleigh Bells" Magical Micas (which came with the September Mediums Add On).  I painted the chipboard with white gesso, before adding the Magical Micas.


This stencil for the masking above, also came in the September Mediums Add On.  It's one of my favorite stencils - it's so pretty.

Swirlydoos Kit Club October Reveal!

It has been such a thrill this month to be a Guest Designer with Swirlydoos and get to play with the wonderful kit and Add On's that are being released today!

The October collection is full of beautiful pieces to enjoy and create with.  Keys and birdcages, ribbon and bling... you will be in scrappy heaven!!  PLUS this month's kit has a mixture of Prima's Epiphany patterned papers, and Blue Fern's Montage.... does it get any better than that???

Welcome to:

October Scrapbook Kit Reveal!

We are not having a blog hop this month, but there will still be ways to win some prizes and, of course, beautiful projects to see from our talented design team!  Go to the Swirlydoos blog to find out how you can win some fabulous prizes just by being a part of our NEW Facebook gallery! Make sure you have LIKED & FOLLOWED 

Swirlydoos is proud to bring you our beautiful October collection:

Treasured Yesterdays


And check out these coordinating add ons that perfectly compliment our October scrapbook kit!


These "add ons" sell out very quickly, so don't delay ordering!  If you want to be sure and get one (or more!!)  every month, send a request to Krissy (krissy@swirlydoos.com) asking to be permanent for such-and-such Add On and it will be included with your monthly kit.


Are you a subscriber? If so, your kit is on it's way! If not, check out the Swirlydoos store to see if there are any September kits or add ons in the store!

Has it sold out? - become a subscriber and not only will you never miss a kit again, but you'll also pay less for your monthly scrapbook kits!
*Mention this blog hop and save 10% on your first kit*


 Never miss one of our kits again!

We have some absolutely beautiful scrapbook projects for you to see today !!  

Look at the fun I've had with this kit!  (I have posted each one of these separately, so you can see more pictures, as well as explanations on how I made them, if you want to.  Just click on the link that I provide.)


You can see how I created the background for this, and how I altered the chipboard frame here.


This month's kit includes a piece of Finnibair's beautiful Honeycomb Resist Canvas paper.  Oh boy did I have fun misting and inking this one!  Check it out here.


Some beautiful Blue Fern "Montage" papers are also included, and they are SO gorgeous that embellishing is quick and easy.  See how here.


This was a very meaningful project for me.  I altered a re-cycled box to store my father-in-law's wrist watch in.  He passed away this week and bequeathed it to my husband, so I wanted something special  to keep it in.  See more pictures here.

Be sure to check out projects from the rest of the Swirlydoos Design Team here:

Linda (Guest Designer!) That's me - doing the "happy dance"!!!  :)


Thank you so much for stopping by today.  I appreciate the time that everyone takes to "travel around"!

 It is Thanksgiving weekend here in Canada, 
and I wish you many blessings!
Linda