Welcome Everyone!

Remember to "click" on all pictures if you'd like to see them a little closer.

Thursday, October 31, 2019

"Child at Heart" Box Card

Hi everyone!  Today, I'm going to share one of my favorite ways to use up bits and pieces of ephemera, by making a box card.


I found the SVG file for the basic box form, from The Non Crafty Crafter here.  She also provides a link to Cricut Design Space where she has it set up and ready to cut.  A big thank you to her for sharing it with us!

This is how I glued everything together after I had cut it on my cricut.  The next step is to glue the small flap on the left to the tall panel at the back and create a box.  I would suggest using liquid glue when making this box in order that you have a few seconds to get everything lined up properly before it starts drying.

This is the box glued together, but I'm showing with the arrow, where I made an error.  That little flap would look better glued behind the tall narrow panel, so leave that panel to glue on after the box is glued.  For my project, I just covered it up with a piece of ephemera.
Those two little pieces in the center of the box are where you glue your ephemera pieces to.

I cut 1/2" by 2" tabs out of a piece of packaging.  Then you glue your ephemera pieces to the tabs, and the tabs to the center of the box.

The back of the box, and the front flap are generally your focal pieces so I put my favorite pieces of ephemera there to start, and build up around them.  You can see above, how I have placed the rainbox.  You need to make sure that when a piece like the rainbow is hanging over the edge as I have it; that it still fits when you fold the card up to put in an envelope.

Here you see I have folded the card up and the rainbow is fitting inside the parameters.  If I had glued the rainbow on the other side, it would be sticking out and wouldn't fit in the envelope.  As I'm gluing tabs on, I quite often close the card and make sure the ephemera bits look correct.

Here is the left side of the completed card.

Here is the right side.

Finally, here is the card folded up and flattened down ready to go into an envelope!  The card is 5" wide and 5-1/2" tall.  Narelle, The Non Crafty Crafter, has also provided a cut file for the envelope... so you will be all set!
Now go grab your bits and pieces and give it a try!
Linda

Wednesday, October 23, 2019

Trick or Treat

Hello!  Today I'm sharing a tag that I did for the Wild Whisper Blog and also for the More Than Words Mini Challenge which started today!

I turned my tag into a shaker card using the coordinating Halloween Night sequin pack by Wild Whisper.

The shaker section was popped up off the tag base, and along the top and bottom  I tucked in some Dusty Attic chicken wire chipboard, along with some of Tim Holtz's Mummy Cloth.  Don't you just love that creepy spider in the center???

The spider, skull and jar were all fussy cut from the delightfully spooky paper.

Add some removable tape to the back of your tag and voila!  You have a piece of home decor to get you in the spirit of things!
Click HERE to find out all you need to know about the Mini Challenge
and to see gorgeous inspiration from the More Than Words DT.
Remember that in order to participate, you have to share your project
on the More Than Words FB page right HERE by the end of the month.

Don't forget to use my coupon code if you go shopping at Wild Whisper, to receive a discount on your order!  (DTLINDA)
Linda

Monday, October 21, 2019

More Than Words Design Team Callout 2020

Design Team Callout 2020


DESIGN TEAM CALLOUT!

More Than Words is changing! With a new administration team in place we are looking to expand our challenges across more social media sites. There will be small but significant changes to the way we run our challenges with the aim being to make them more accessible to all.

We are looking for new Design Team members to help carry out our expansion in 2020. Ideally, they would be:
ü  Great designers of scrapbook pages, art journals and/or off-the-page items
ü  Active on social media
ü  Able to submit projects on time
ü  Able to work within a team environment

Design Team members are required to:
·         Create a project for our Main Challenge each month
·         Create a project for our Mini Challenge approx. every second month
·         Comment on entries
·         Be actively involved in team discussions and decisions

The term is for 12 months, starting January 1st, 2020.

If this sounds like you, please message us on the More Than Words Facebook page, simply telling us you are interested and providing us with an email address that we can contact you on. Entries close October 31st.


Thursday, October 10, 2019

Cross Canada Blog Hop - Hawthorn


Hi everyone!

Well, a month has flown by and it is already time for the October Cross Canada Blog Hop for CTMH consultants.  This month we are featuring the Hawthorn collection.

To purchase any of the items seen in our blog hop today, please contact your local consultant to place an order.  For my customers, if you click on the links that I have hi-lighted, they will take you directly to my online business account.

We hope that you will take the time to leave comments on our posts, as we love to get feedback from our viewers....whether it was something that you really liked or some new technique that has inspired you. Comments help us to create posts that will give you the information that you are looking for.

If you have just hopped onto my blog, you can start here as this is a circular hop. If you came from Jessica's blog then you are in the right place!

On this post I talked about how much I like the Card Making Workshops that CTMH always includes in each catalogue, and for THIS post today, I am STILL feeling the love for the workshops only this time it's Hawthorn!  I absolutely fell in love with the included stamp set and HAD to have it... you probably know how that goes!  ;)

I followed the workshop instructions to create the background mats, but then I went in a different direction using other stamp sets that I have and love.

First up is the one with the beautiful exclusive workshop stamp set.  For this one, I followed the directions as stated, but I stamped extra pinecones and popped them up in the center of the leafy spray.  I used Sangria ink on the saffron patterned paper and it created a lovely brown.  I also added a couple of wooden leaves that I had in my stash.


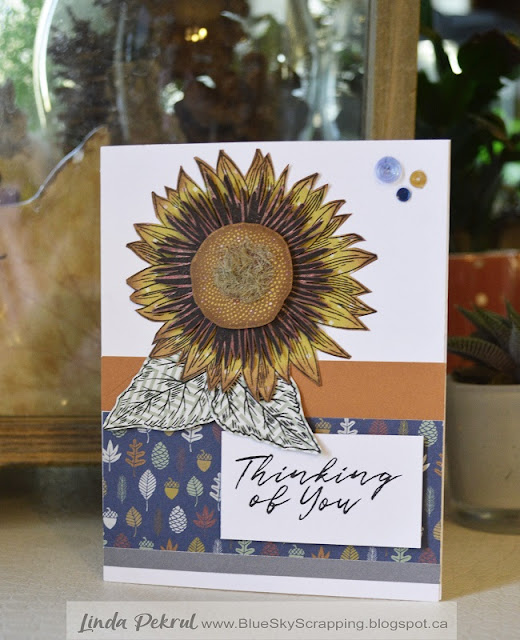
Next up I used D1872 Sunflower Sympathy on the card.  I love this sunflower stamp!  I stamped it out 3 times and fussy cut the three separate layers.  I then popped up each layer to give it some lovely dimension.


I stamped the sunflower on the saffron patterned paper and coloured the outer tips with Sangria ink.  I also used Sangria to colour the inner fringe, and the edges of the middle piece.  Then I took a small piece of jute and snipped it into 1/8" pieces which I used to cover a blob of glue that I placed in the middle of the sunflower.  Here's a close up for you:


For the third card I made from this workshop, I used a frame stamp that I purchased from an earlier catalogue this year called Flourishing Frame A1235.  I stamped it with Paprika ink and topped it with a butterfly from the Every Little Thing Cardmaking Workshop G1189 that was stamped on the saffron paper.  The sentiment and other embellishments are from my stash.


Thanks for hopping along with us!  I hope you have been inspired by the Cross Canada Blog Hop to try out some of the designs,
products and techniques you have seen! 

Watch for the Cross Canada Blog Hop again next month when the paper collection featured will be the fun and cheerful Christmas collection
 called Holly Jolly!

Be sure to mark November 10th on your calendar!

Happy creating,
Linda

Your next stop on the Cross Canada Hop is at Janet's blog.

In case you get lost, here is a list of the consultants who are featured on the Blog Hop this month:

Linda - You are here.


Wild Whisper's blood curdling Halloween Night!

Halloween Cards that Curdle Your Blood! by Linda

When black cats prowl... and pumpkins gleam... may luck be yours on Halloween!
That's just one of the cute sentiment cards you will find in Wild Whisper's Halloween Night paper pack!

Eeek... this collection is scary!  So scary that I dug around the internet for some SVG files that could do it justice!  Here's the 2 cards and a little treat bag that I came up with.
The first card I made was this delightful? skeleton man below.  Thanks to the wonderful imagination of Tim Holtz and his "Creepy Eyes", this guy looks like he is burning a hole right through your soul!  

The skeleton man is a Silhouette file created by Snapdragon Snippets called Skeleton Hat Shaped Edge Card.  The other embellishments on it are also from Tim Holtz.  (I think he's the "King" of Halloween!) As for the paper... don't you just love the creepy skulls?  The black skull was cut from the piece that has the black, spooky house on it.  *shivers*

What is Halloween without a Witch?
  
This card is another Silhouette file called the Witch Double Diamond Fold Card by Snapdragon Snippets again. The witch is a file from Cricut Design Studio.
               

There's an incredible amount of fun stuff to "fussy cut" out of some of the papers.  Those perfectly creepy spiders came from one of the bottom strips included on each piece of paper.

Can I offer you some cockroaches?  A small snake?  Perhaps a scorpion???

Even the scariest of paper can be fun if you throw a happy Jack o'Lantern face on it!  This little treat bag is also a Silhouette file, this time by Lori Whitlock.  She calls it a 2 ON 12X12 TAG BAG JACK-O-LANTERN.

Have a "howling" good time getting YOUR cards ready for Halloween! 
Don't forget to use my coupon code DTLINDA to receive a discount when you're shopping at Wild Whisper!
Linda


Thursday, October 3, 2019

Every Little Thing Cardmaking

Hi there,

Today I thought I would share my thoughts about the Every Little Thing Cardmaking workshop that is available through Close to my Heart.

This cardmaking workshop provides everything you need to make SIXTEEN A2 size cards.... a stamp set, dies, embellishments, paper, and card bases plus envelopes, as well as complete instructions on how to make 3 different cards.  That is a lot of value in one fun package!  I have calculated the price as working out to $3 per card and then you still have the stamps and dies to create more cards, or to create embellishments for your scrapbook pages!


This is my version of one of the card designs from the kit.

The kit's card (shown above) is very pretty and a little more simple, as seen above, but I had extra embellishments from the Vellum Die-cuts  and the Complements so I added them to the card.  I also had a left-over scrap of the mint paper from the paper packet so I used it to stamp the little leaf pattern all over.


I used a Tim Holtz die from my stash called Crochet, to cut the border behind the butterfly.  CTMH's Lace Border thin cut would also have worked well here.

I used a sponge dauber and the new Julep ink to colour the center of the butterfly.  For the more subtle, shimmery look shown in the CTMH card, use the Julep Shimmer Brush.


For the inside of my card, I used a couple of the Picture my Life cards topped with another piece from the Complements package.


Here's a look at the stamp set that comes with the kit.  It is only available by purchasing the complete kit.  
The three lovely sentiments work for many occasions, the butterflies are beautiful and easily cut out with the included dies.  There are several additional smaller stamps to fill in backgrounds, as the instructions explain fully.  
(Click here to see the workshop instructions.)


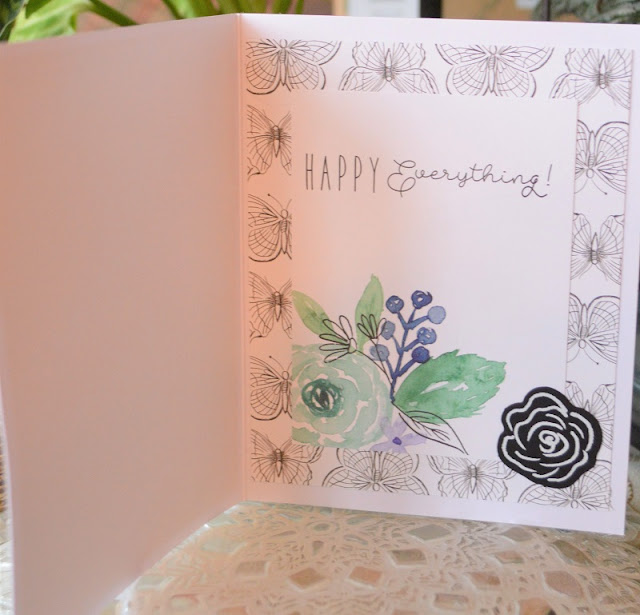
A closer look at the inside of the card shows how you can take the rose and leaves in the stamp set, to create a similiar flower cluster as the one above.  So pretty!

National Cardmaking Day is this Saturday, October 5th.  
Have a fun time playing with your stamp sets!

Linda

Please note:  If you click on the coloured links in my post, you will be taken to my CTMH online store where you can see more about the products, and make a purchase if you wish!