Welcome Everyone!

Remember to "click" on all pictures if you'd like to see them a little closer.
Showing posts with label Cheery Lynn Italian Flourish Doilie die. Show all posts

Monday, July 1, 2013

Showcase Monday at Scrapbooker's Paradise

Happy Canada Day! and welcome back to Showcase Monday!!

I needed a wedding card this week and what better paper collection to go to than "True Romance" by Kaisercraft!!  New in the store this week, it is absolutely beautiful!

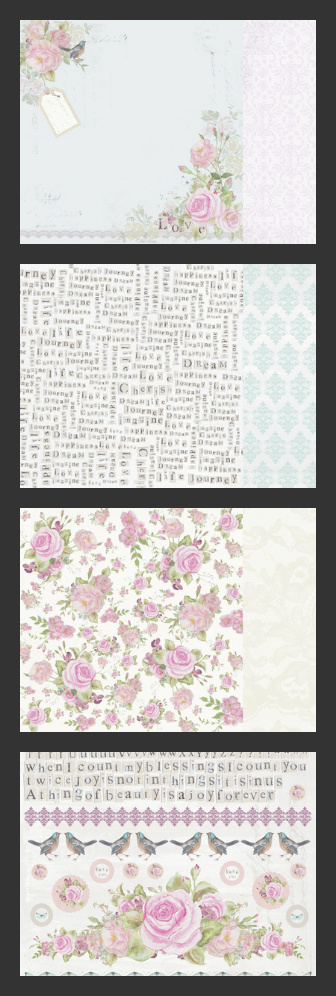
I chose to do a lot of fussy cutting with this paper, as it has so many lovely elements in it.  These were the papers I used, in addition to the sticker sheet, which comes as an extra bonus when you purchase the complete paper pack.  From top to bottom:  LovestruckFirst Sight, and Adore - the bottom one is the sticker sheet. 


I started by cutting out the images I liked and inking all their edges with Old Paper Distress Ink.  I also cut out some die cuts and inked them as well.  I used Spellbinders Labels 10 for the title piece, Spellbinders Resplendent Rectangles and Spellbinders Fancy Lattice for the other pieces.

*tip:  When using these intricate dies, lay the die on top of a piece of wax paper and then put on top of cardstock.  The die cut piece will then pop out very easily.


Here is a close up of the title.  I didn't like how "I Do" looked when I laid it out on the card, so I die cut some of the words from "First Sight" and used them instead.  I popped it up with pop dots to give it some depth.


I love the little bird in this collection!  This photo shows you how I stacked up the different pieces of the roses that I fussy cut.  The large rose is also sitting higher with pop dots.  Then I die cut a doily (Cheery Lynn  Tiny Italian Flourish Doily die) and tucked pieces of it here and there, and added some lace and bling which I'll list below.


When it came to the inside, I used more of the dies from the Resplendent Rectangles set and stamped the image with a Fiskars sentiment from my stash.  All the pieces were then inked with Old Paper Distress Ink.  The little butterfly is from the sticker sheet.


Since I had a gift card to go with this card, I also made a little envelope to tuck it into, that fits neatly inside the card.  I used one of my Martha Stewart punches "Cherish" on the edges, and made a belly band from lace and a couple of stickers, to hold the envelope closed.


The card was 4"x6" and the gift card holder was about 3-1/2"x5".

Supplies used:

Spellbinders Resplendent Rectangles (Romantic Rectangles is also lovely)
Fiskars "Just Married Quotes"
Martha Stewart "Cherish" Punch Around the Page
Martha Stewart Lace Butterfly 
Offray Ribbon Flowers

I hope wherever you're celebrating on this holiday Monday, you're surrounded by good companions and plenty of sunshine!

Linda

Friday, April 12, 2013

PPC112 Playing in Paradise Challenge

Good Morning everyone!  We are starting a new challenge at Playing in Paradise today.  Allison is hosting and has provided us with another wonderful sketch to work with.


I decided to make a birthday card using a combination of Prima's "Firefly" paper and G45's "Place in Time".  


I cut the leaves for my flowers with Spellbinders "Bitty Blossoms" die, and thought I would share a tip with you that I just learned this week.  After you've cut the leaves - ink the edges, use a stylus to give them a "cupping" effect, and then FOLD them as shown in the photo.  Then they will tuck perfectly under your flowers.  I never knew to fold them!  *shaking head in amazement*   The die that I used for the vines is from my stash and is called "Leafy Flourish" by Die-namics.


Sketches are wonderful when your mojo has gone into hiding.  I couldn't think what to do this week, and then I decided I wanted to use my favorite doily die for the circle on the sketch.  From there, I just kept adding elements as I looked at the sketch.  Next thing I knew .... I had a card!

So DO drop by Playing in Paradise this week and try out the sketch for yourself!!  We'd love to see YOUR interpretation of it.  The rules can be found here, and they are very simple.  

After you're done checking out the rules, be sure and visit the rest of the design team's blogs (just "click" on their names) - it's so inspiring to see how different all the projects are even though they start with the same sketch!

The prize to be won this week is:  The Sweetest Thing stickers, brads, enamel dots, doilies and layered stickers.  This awesome package is worth $25 and you get a chance to win it just by linking your project to the challenge!

Have a good weekend everyone!


Supplies used:

Friday, March 22, 2013

PPC109 Playing In Paradise Challenge

Good Morning and a Happy Spring Day to you all!
We've just had another snow storm here in Alberta,
but hopefully a Chinook will roll in and melt all our troubles away soon!!


I'm so happy to be the hostess this week at Playing in Paradise!  I'm challenging you to use banners on your projects because I think banners are a lot of fun.  Show me what you can do!

Warning:  There are a lot of photos and details in this post!! 
You better get a BIG cup of coffee!

 If you would like to see a bigger image, just click on any of the photos. 


Ok …. Confession time …. I was going to use this layout of my dog, Harley, for my challenge (isn't he a handsome fellow??). I had made it a few weeks ago and loved how the banners accented the circle frame.  It was a pretty simple layout to do.  

I used one piece of background paper (check out the awesome Kaisercraft ones that are in the store now), painted over a mask with gesso, and then added a chipboard frame, banners, and embellishments.  (By the way, if you love feathers as much as I do, check out these ones that are in the store now.  Yummy!  I picked up a few and have them stashed away.)  :)  


However, you know what it’s like when you get some new patterned paper... you get all excited and want to do something with it!!  So I made another layout and used banners in a different way!  It's a "2 for 1" week here on my blog.  LOL

I just LOVE this Marigold line by Kaisercraft and when I saw it had banners in the sticker pack, I just HAD to do a layout using it. The more I played with this paper, the more I loved it.  It has some fabulous quotes and titles and I’ve decided it would make a wonderful Graduation mini for some lucky young woman!  (That just might be my next project!) 

The two cuties in the layout are my grandchildren (of course).  They are such good little buddies; Austin would follow his big sister anywhere.  When they're at my house they always cuddle together in this chair and Emily reads stories to Austin, it's SO cute.  It's one of those "little moments" that I want to preserve forever!


I thought I would give you a bit of a "Build a Page" tutorial on how I made this.  Here's a couple of pictures of the KaiserCraft "Marigold" supplies I used.  If you've never seen what comes in a KaiserCraft "Collectibles" embellishment pack, that is what you see on the left hand side.  Oodles and oodles of beautiful pieces to work with and layer.  The store is out of the Marigold "Collectibles", but there are still "Bundle of Joy" Boy and Girl packages, as well as "In the Attic" if you are working with any of those papers.


Here is the sticker sheet that coordinates with the collection.


Now by the time I was done piling on embellies, you can only glimpse my banner LOL, but I like the effect of it peeking out from under the flowers.  

To make it, I wanted the stickers to be a little sturdier in order to distress them, so I attached them to some cardstock.  This photo shows them distressed and scrunched to give more texture and depth to the layout.  I have also started the process of laying the embellies out and figuring out how I want them placed on the layout.


I used 1/4" Scor-Pal tape to attach them to my patterned paper.  It made it easy to line them up and keep them straight.


Here's a close-up of the floral banner I ended up with.  It's hard to tell by the picture, but it has a lot of different heights in it, as I wanted to be able to tucks bits and pieces in.  I used foam squares to achieve the first level of height.


And then I glued some cardboard scraps on, to get the 2nd layer of height.  When I was done, I tucked in miniature flowers from my stash, bits of yarn, and little brown flourishes that were made with a Spellbinder die similar to this one.  I embellished the flourishes with a Copper pearl pen (so easy to use). 


I didn't have any flowers in my stash that I liked, for the top of the layout, so I made this one using my Tattered Florals die.


After moistening and scrunching the flower pieces, I dried them and then brushed them with some Bronze Glimmer Mist mixed with Walnut distress ink.  The leaves came from the sticker sheet, and again, I glued them to cardstock, cut out, and distressed them.  I felt the button was too shiny, so I painted it with Gesso, and then brushed it with the Glimmer mist mixture also.  I wanted to use my Cheery Lynn Italian Flourish Doily die as a mat for the flower, however it was too big, so I cut it down a bit as you can see in the final picture.  If you're a crocheter, as I am, you will have lots of bits and pieces of yarn laying around.  This is the blue, fluffy pieces you can see tucked in around the flowers at the top and bottom of the layout.


That doily die is so beautiful, I just had to show you what it looks like.  I used wax paper when I was cutting it, to make sure all those intricate little pieces came out easily, and look at the beautiful wax paper one I got as well!  Bonus .... I'll be saving that for another layout!


And THEN, look what happened when I started playing around with it, and cutting it up.  You also get gorgeous hearts!!!  I love it when a die is so versatile.


In this photo below, you can see where I was playing around with the bottom embellishments, trying to figure out how to place the flowers.  I don't know about you .... but this takes me a LONG time!  LOL  

You can also see some stitching that I added, to give the page some more texture at the top and bottom.  The upper right hand stitching pattern was lifted from a page Shona Keehn, a wonderfully talented artist from British Columbia, had done.  I LOVE her style of scrapping!


 So there you have it.  Here's the final result one last time.  If you look closely at the little border strip on top of the photos, I added extra little "pearls" with the pearl pen I mentioned above.  The border strips, by the way, are the cut off pieces from the patterned paper that have the UPC code on them.  KaiserCraft doesn't waste any paper!


Soooo, if you've made it to the bottom of this post, I would really like to encourage you to check out the challenge at Playing in Paradise, and enter one of your pieces of work.  The design team has come up with some wonderful projects to give you more inspiration and there is a fabulous prize to be won as always!

The rules are very simple and can be found there also.

See you there!
Linda

Supplies used: